Get your fix of everything retro — specialists in imported & rare retro
Imported & Rare Retro

Shop By
That heart-sinking moment when you slide a cherished classic-The Legend of Zelda on NES, Super Mario 64-into your console, hit the power button,...


That heart-sinking moment when you slide a cherished classic-The Legend of Zelda on NES, Super Mario 64-into your console, hit the power button, and… nothing. Just a black screen or a frustrating flicker. We’ve all been there. The internet is a minefield of conflicting advice, from the age-old myth of blowing on the contacts to using harsh chemicals that can strip the pins and ruin that iconic label forever. It’s enough to make any collector nervous about damaging their prized possessions.
Well, it’s time to get your fix of knowledge! This guide cuts through the noise and shows you exactly how to clean retro game cartridges safely and effectively. We’ll share the professional, time-tested methods to bring your classic NES, SNES, N64, and Game Boy games back to glorious, working life. You’ll learn a repeatable process that not only gets your games booting reliably but also preserves their appearance and value for the long haul. Let’s get those cherished memories firing up on the first try, every time.
Got a cherished game that just won’t boot? Before you panic, remember that a dirty cartridge is the most common culprit. Decades of dust, grime, and oxidation can build up on the contacts, preventing your console from reading the game. Knowing how to clean retro game cartridges properly is the first and most vital step in any repair, often bringing a seemingly dead game roaring back to life. The golden rule is simple: always start with the least aggressive method first. Set yourself up at a well-lit desk with a soft microfibre cloth or mat to protect your iconic plastics from scratches.
And let’s get one thing straight: we all did it, but blowing into cartridges is a terrible idea! That nostalgic ritual introduces moisture and saliva directly onto the metal contacts. While it might offer a temporary fix, it accelerates corrosion and causes long-term damage. It’s time to trade that bad habit for a professional approach. The copper contacts are the heart of the ROM cartridge technology, and they deserve proper care.
This is your basic, non-negotiable kit for getting started. You can find most of these items at a local electronics shop or online for just a few quid.
Ready to take your retro game maintenance to the next level? These tools allow you to open up cartridges for a truly thorough restoration.
Using the wrong products can permanently damage your games. Steer clear of these at all costs:
Let’s get straight to the heart of the matter. When a cherished classic refuses to boot, 99% of the time the issue is dirty contacts. This is the most critical part of learning how to clean retro game cartridges. Over the decades, those shiny copper pins on your game’s PCB (Printed Circuit Board) accumulate a layer of dust, grime, and oxidation that prevents a solid connection with your console. The goal is to gently but firmly remove this build-up without damaging the board. As professional preventive conservation guidelines for electronic media stress, contaminants like dust and oils are the primary enemies of longevity. We’ll start with a simple surface clean before moving on to a more thorough deep clean if needed. Always remember to test the game in your console after each attempt!
This is your first and often most effective weapon against a non-working game. You’ll need high-purity Isopropyl Alcohol (IPA) – we strongly recommend 99% for its rapid evaporation and minimal water content, which is much safer for electronics.
If the surface clean didn’t do the trick, it’s time to get serious. Some cartridges, especially stubborn ones from car boot sales or dusty attics, need a deeper clean. Opening the shell gives you direct, unimpeded access to the contacts for a much more thorough scrub.
You’ll need a special screwdriver (usually a 3.8mm Gamebit for Nintendo carts) to remove the screws on the back. Once they’re out, carefully separate the two halves of the plastic shell and lift out the PCB. Now you can repeat the IPA cleaning method with much better leverage and visibility. This is the definitive way to get those treasured games working like new again.
Don’t have the right tools to get the job done? We’ve got you covered. Check out our repair accessories to get your fix!
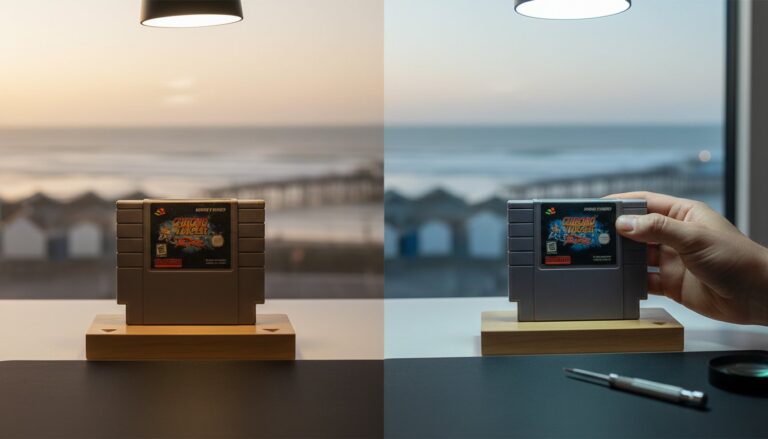
With the internal contacts sparkling, it’s time to give the outside of your cherished classic the attention it deserves. Restoring the plastic shell and label isn’t just about aesthetics; it’s about preservation. A clean, well-cared-for cartridge looks fantastic on the shelf and can significantly increase its collector’s value. The biggest challenge is working around the delicate paper label, which can be decades old. Patience is your best tool here-a slow, careful approach is the secret to how to clean retro game cartridges safely and effectively.
For the everyday dust and fingerprints that accumulate over years of love, a simple approach is best. Start by giving the entire cartridge a thorough wipe-down with a dry microfibre cloth. For those hard-to-reach seams and crevices where dust loves to hide, a dry, soft-bristled brush (like a new toothbrush or a small paintbrush) works wonders. If you encounter more stubborn dirt, lightly dampen a small section of your cloth with water, wring it out completely, and gently wipe the plastic, staying well clear of the paper label at all times.
Ah, the dreaded charity shop price sticker or a previous owner’s initials in permanent marker. Don’t despair! For this, we can turn to a trusted cleaning agent: Isopropyl Alcohol (IPA) or a dedicated product like Goo Gone. Just as high-purity IPA is the go-to for the contacts-a method supported by principles in professional electronics conservation-it’s also fantastic for breaking down adhesives and ink on plastic. Apply a small amount to a cotton swab and gently rub the affected area in small circles. Be extremely careful not to let any liquid touch the label. For stubborn residue, you can use a plastic scraper or your fingernail to gently lift the gunk as it softens. Wipe the area clean with a fresh cloth afterwards.
The label is the soul of the cartridge, and protecting it is paramount. The golden rule is to never apply liquids directly to the front or back labels. If you notice a corner is starting to peel up, you can rescue it. Use a toothpick to apply a tiny dab of an acid-free glue stick to the underside of the peeling corner and press it down gently for a few moments. For long-term protection, especially for your most valuable titles, consider investing in archival-quality plastic box protectors. They keep dust off and prevent scuffing, preserving that iconic artwork for years to come.
Sometimes, a simple surface clean with isopropyl alcohol just won’t cut it for a truly stubborn game. When a cherished classic refuses to boot, it’s time to go a level deeper. Not all cartridges were created equal, and understanding their unique designs is key to knowing how to clean retro game cartridges like a pro. These advanced techniques often involve opening the shell for direct access to the PCB contacts.
Pro-Tip: Remember, a clean cartridge is only half the battle! A dirty console’s cartridge slot can transfer grime right back onto your pristine game. Use a dedicated cleaning kit or a credit card wrapped in an IPA-dampened microfibre cloth to carefully scrub your console’s connectors for the best possible connection.
The iconic grey Nintendo carts are built like tanks, but they have their quirks. To get inside, you’ll need a special 3.8mm Gamebit screwdriver. Once open, you can give the contacts a proper deep clean with a pencil eraser followed by IPA. Pay special attention to:
Sega’s classic black carts are a bit different. Most require a larger 4.5mm Gamebit screwdriver to open. The unique curved top, while stylish, is a magnet for dust that can fall onto the contacts. A quick blast of compressed air or a gentle sweep with a soft brush before cleaning the pins will work wonders. For collectors, be extra gentle with those cardboard-box games to prevent scuffs and shelf wear on the packaging.
These little guys have seen the world, and their condition often shows it! Their portability means they’re frequently clogged with pocket lint and other debris. The contacts are smaller and more delicate, so use less pressure when cleaning. You might need a tri-wing screwdriver or a 3.8mm Gamebit for older Game Boy carts. A meticulous, gentle approach to cleaning these portable powerhouses will bring them back to life.
Feeling overwhelmed or missing the right tools? Don’t risk damaging your collection. At RetroFix, we offer professional cleaning and repair services to get your games in top-tier condition. Get your retro fix today!
You’ve followed all the steps. You’ve patiently used Isopropyl Alcohol, carefully scrubbed with a cotton bud, and polished the pins until they gleam. But your cherished game still refuses to boot, or it flickers and dies. It’s a frustrating moment for any retro enthusiast, but don’t lose hope. Sometimes, even knowing exactly how to clean retro game cartridges to perfection isn’t the final answer. The problem might run deeper than surface-level grime, and knowing when to stop is key to preventing accidental damage.
When a simple clean doesn’t do the trick, it’s often a sign of an issue with the cartridge’s Printed Circuit Board (PCB). Pushing further with abrasive methods can turn a repairable problem into a permanent one. This is where the experts come in.
Before you put that game back on the shelf for good, grab a magnifying glass and look for these tell-tale signs of a more serious fault. If you spot any of these, it’s time to step away from the cleaning kit:
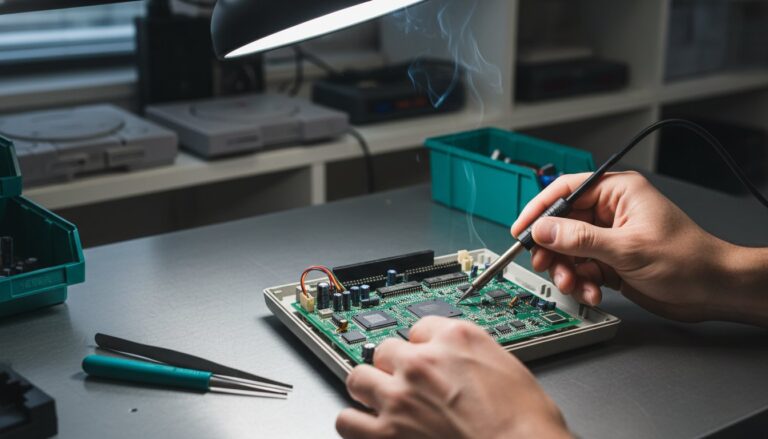
Attempting to fix damaged traces or re-flow solder without the right gear can be a recipe for disaster. Here at MyRetroFix, we live and breathe this stuff. We have the specialised diagnostic tools, soldering stations, and expertise to tackle these issues head-on. Our services, like professional pin restoration and delicate trace repair, are designed to bring iconic games back from the brink.
For a rare or sentimental title, a professional repair is often far more cost-effective than trying to source a replacement. We’re passionate about preserving these classics so they can be enjoyed for years to come. Don’t let a faulty connection be the end of your adventure. Got a stubborn game that just won’t cooperate? Let our experts take a look.
You’re now equipped to bring your favourite games back from the brink of the dreaded black screen. Remember, the secret to success lies in using the right tools-like high-purity isopropyl alcohol for the contacts-and applying a careful, patient touch to the plastic shell and label. Mastering how to clean retro game cartridges is a rewarding skill for any collector, ensuring those iconic 8-bit and 16-bit memories are preserved and ready for your next gaming session.
While proper cleaning can revive many forgotten gems, sometimes a cartridge needs a specialist’s touch, or you simply want to add a new, perfectly working classic to your shelf without the hassle. At MyRetroFix, we are passionate experts and specialists in retro console repair and modification, treating every game with the care it deserves. Our collection features a wide range of rare and imported titles, all professionally cleaned, tested, and guaranteed to work.
Ready to skip the swabs and get straight to playing? Get your fix! Shop our collection of professionally cleaned retro games.
Happy gaming, and may your collection bring you joy for years to come!
Ah, the classic playground trick! While a pencil eraser can physically scrape dirt off contacts, we strongly advise against it for your cherished games. Erasers are abrasive and can slowly wear away the thin gold plating on the pins, causing permanent damage. It’s a short-term fix with long-term risks. For a truly safe clean, stick with a cotton bud and high-purity isopropyl alcohol (IPA). It cleans effectively without harming your precious carts for years to come.
Great question! When it comes to cleaning your retro collection, less is definitely more. You should only clean your cartridges when they start having issues, like not booting up, or if you can see visible dirt or corrosion on the contacts. Cleaning them too often, especially with any abrasive method, can cause unnecessary wear. A good rule of thumb is: if it isn’t broken, don’t fix it! Keep them stored properly, and you’ll only need to perform a clean very rarely.
Definitely avoid household cleaners like Windex or furniture polish on your cartridge shells! These products contain harsh chemicals like ammonia that can degrade the plastic over time, causing it to become brittle or discoloured. For general dust and grime on the shell, a simple cloth lightly dampened with water is perfect. For tougher marks like old sticker residue, a small amount of isopropyl alcohol on a cotton pad will do the trick without damaging that iconic retro plastic.
Absolutely, it’s a very common issue! If you’ve thoroughly cleaned your carts and they still won’t load, the culprit is often a dirty cartridge slot in your console. Think of it this way: putting a clean game into a dirty console is like taking a shower and putting on dirty clothes! The console’s pin connector accumulates just as much dust and grime over the decades. Giving that slot a careful clean is the essential next step to get you back in the game.
Cleaning the console’s connector is a crucial part of the process. The best method is to use a dedicated 1-UP Card-style cleaning kit. If you don’t have one, a DIY solution works wonders: wrap a thin, lint-free cloth (like from an old t-shirt) around a credit card, apply a few drops of high-purity IPA, and gently insert and remove it from the slot a few times. This safely scrubs the internal pins without being too aggressive, ensuring a solid connection. Of course, when a console reaches the end of its life, especially modern ones with hard drives, responsible disposal and data security become paramount. For those interested in that aspect of hardware management, Surplus Technology Solutions offers expert guidance on the topic.
Quite the opposite! Properly and safely cleaning a game will almost always *increase* its value, both for collectors and players. A clean, fully-functional cartridge is far more desirable than a dirty, non-working one. The key is using the right techniques, as detailed in our guide on how to clean retro game cartridges. Damage from harsh chemicals or abrasive methods will certainly decrease value, but a careful restoration to get it working perfectly is a massive plus for any collection.